Creating Custom Profiles with Match Profiler
Use Match Profiler, shown below, to create custom profiles. The term "profile" describes a specific subset of weight matrices from TRANSFAC with core similarity cut-off values and matrix similarity cut-off values for each matrix.
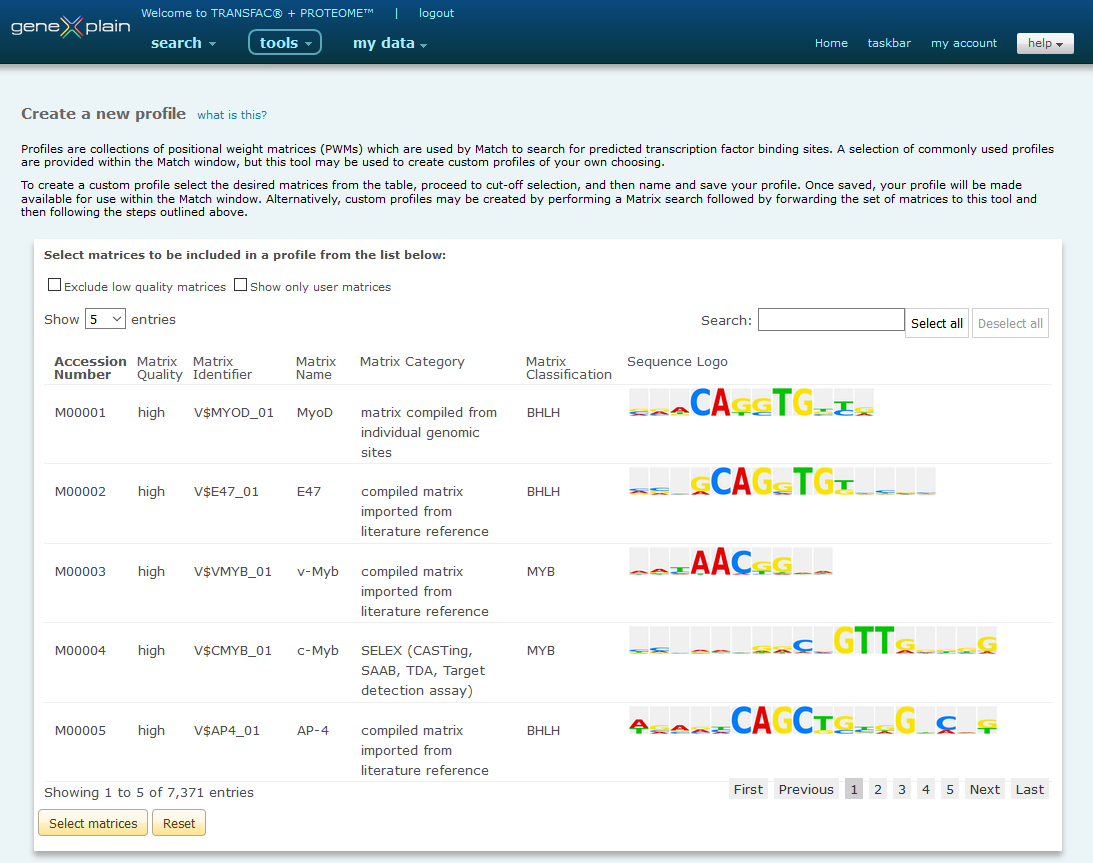
Match Profiler
Create a New Profile
Creating new profiles using Match Profiler involves the following steps:
- Select matrices of interest
- Choose matrices to include in the new
profile
- Set cut-offs for your profile
- Save profile
Please note: Profiles can also be generated based on a matrix selection from a TRANSFAC database search (see below). In that case steps 1 and 2 will be skipped and the matrix selection will be forwarded to the Profile Generation tool in Match on step 3.
1. Select Matrices of Interest
To create a new profile, first select the matrices of interest to examine more closely.
Search for matrices to select by typing accession number, matrix identifier or factor/matrix name (or a part thereof) in the search box above the matrix list. The matrix list will automatically adapt to the search term. To view the complete list of matrices fitting to the search term, set "Show ....entries" to "All".
Please note: More refined searches are available via the database search, e.g. under TRANSFAC Module Search or in the Ontology Search, which allow you to find matrices for factors with certain properties. Such a matrix search result can also be used as basis for generation of a profile (see below).
Select from the list of found matrices by clicking the "Select all" button above the search box or by clicking on individual matrices in the list. Then use the "Select matrices" button underneath the matrix list.
The selected matrices will appear at the bottom of the page. The name of the factor whose binding site is described by the matrix, the accession number, and the quality of the matrix are given. Accession numbers are hyperlinked to the corresponding TRANSFAC Matrix Reports.
In addition, for each selected matrix the false positive frequency at various false negative rates is displayed. The false positive rate was estimated on promoter sequences, while the false negative rate was calculated on known genomic binding sites for the factors or, in case not sufficient (less than 10) genomic binding sites were available, SELEX sites or sets of generated oligonucleotides were used. When there are several matrices for the same factor, the false positive rate could be used as selection option, i. e. that matrix could be included into a profile that produces the smaller number of false positive matches for a desired false negative rate.
To add additional matrices, which apply to a different search term, repeat the above steps (searching and marking the respective matrices) and then click "Add matrices" (instead of "Select matrices").
Further, it is possible to generate a new profile based on an existing profile, by adding and removing matrices as described under "Manage existing profiles" below.
2. Choose Matrices to Include
Individual matrices can be excluded from further steps by unchecking the check box in front of the matrix. Then click "Proceed to cut-off selection".
3. Set Cut-offs
Specify cut-offs for each matrix. Under 'Select the following cut-off for all matrices', choose among cut-offs to minimize false positive matches (minFP), to minimize false negative matches (minFN) and to minimize the sum of both error rates (minSUM). The cut-offs allowing a false negative rate of 10% (FN10), 30% (FN30), 50% (FN50), 70% (FN70) and 90% (FN90) are also given. For each of these false negative rates, the core and matrix similarity scores are given for the respective matrix, as well as the FP frequency (per 1kb nucleotides), which was estimated on upstream sequences. To specify your own cut-off values, select 'other' and then type core- and matrix similarity cut-offs (between 0 and 1) into the respective fields, followed by clicking on 'Set' to accept the choice for all matrices.
Please note: minFN and FN10 are identical.
4. Save Profile
To save the customized profile, enter a name for the file and click "Save". The newly-created profile will be displayed and can immediately be used in Match (click the "Return to match" link). The new profile will be listed in the Match main interface in the profile selection list under "User defined profiles" as well as in the Gene regulation analysis -> Data -> Profiles folder of the my data Data Mangement system.
The profile can also be downloaded via the "Download" button above the newly saved profile (or via the respective button under "Manage existing profiles" discussed below), for command line use. (A command line version of the core Match program is provided in the download of the TRANSFAC flat file release.)
Create a Match Profile Based on a Database Search
Alternative to the profile generation described above, a Match profile can also be created based on a search result in TRANSFAC with matrices as a result.
You can get a matrix list for profile creation, either by directly searching for matrices using the main search options (optionally restricted to Matrix search) or by searching for Matrix via the respective custom search options. Alternatively, for a search result (e.g. based on an Ontology Search for tissue specificity, GO assignment, disease connection, etc) containing transcription factors, the list of matrices which are linked to these factors can be retrieved by using the "Search within results" with "Matrix" selected. For further details see the section on "Create Match profiles" here.
When you mark some or all of the matrices in the search result and click on the "Profiles" icon above the result table, the matrix list is opened in Match Profiler (Note: Match Profiler opens in a new window or tab or where Match is already opened), where you can select cut-offs (and as required unselect matrices to be excluded from the profile). See step 3 above.
It can be advisable to include the chosen cut-off in the profile name (e. g. if you want to use the profile on command line), for example "angiogenesis_minFP" in the given example above as this profile contains matrices for factors with GO assignment "Biological Process: Angiogenesis", with cut-off minFP (to minimize the number of false positives).
Please note: The cut-off which you set in Match Profiler is used for analysis in Match. When you click SAVE the profile is saved for use in the Match online version. The new profile will be listed in the Match main interface in the profile selection list under 'User defined profiles'.
Download a new Profile
If you would like to download the profile for use with the command line version of Match (for subscribers to the TRANSFAC flat file release), please use the "Download Profile" option on top of the page with the saved profile and save the downloaded profile to the "prfs" folder of the match branch of your local TRANSFAC flat file release. (Note: When you download the profile it can happen that the extension "txt" is added to the profile name, i.e. that ".prf" is modified into ".prf.txt". For use of Match within the CLCbio workbench, please remove the ".txt".) Previously saved profiles can be downloaded via the respective function on top of the requested profile page (see below).
Manage Existing Profiles
View a Profile
Created profiles can be viewed by selecting the desired profile from the Gene regulation analysis -> Data -> Profiles folder of the my data Data Management system.
Download a Stored Profile
After selecting a profile from the Gene regulation analysis -> Data -> Profiles folder of the my data Data Management system click the "Download" button.
Delete a Stored Profile
Click the red "X" next to the profile that you wish to delete in the Gene regulation analysis -> Data -> Profiles folder of the my data Data Management system.